

HTML to PNG Quote Card Designer (html-to-image)

Turndown HTML to Markdown Converter (Paste Rich Text, Get Markdown)
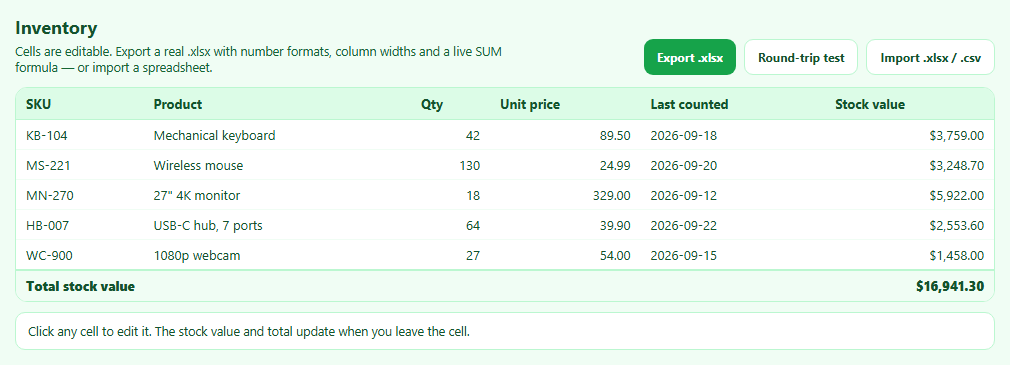
SheetJS Table to Excel Export and Import (.xlsx)
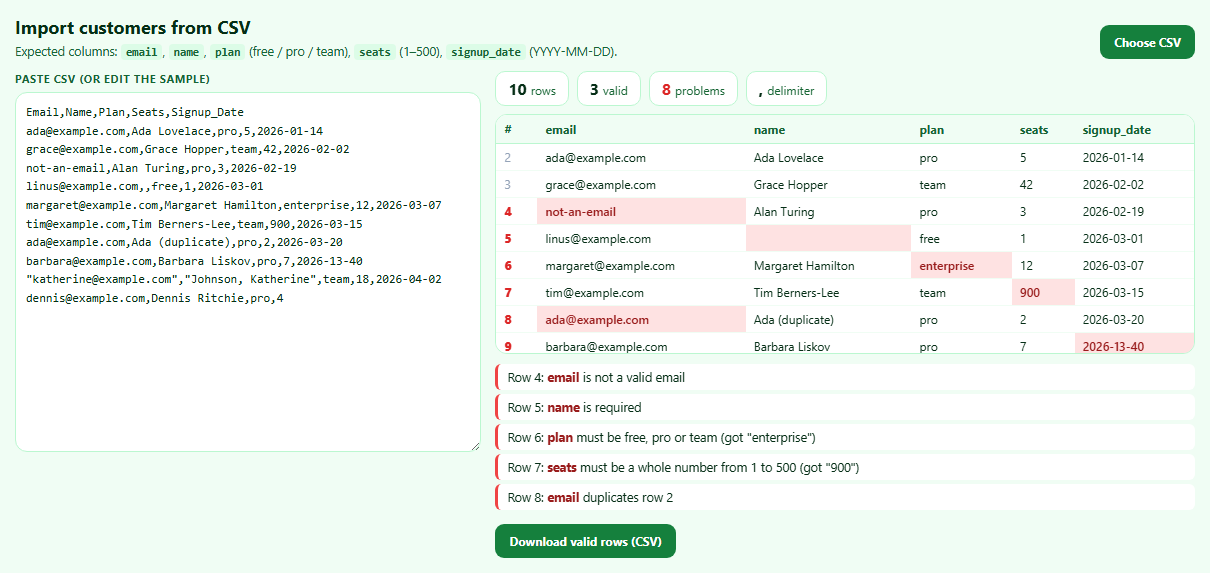
Papa Parse CSV Import Validator with Error Report
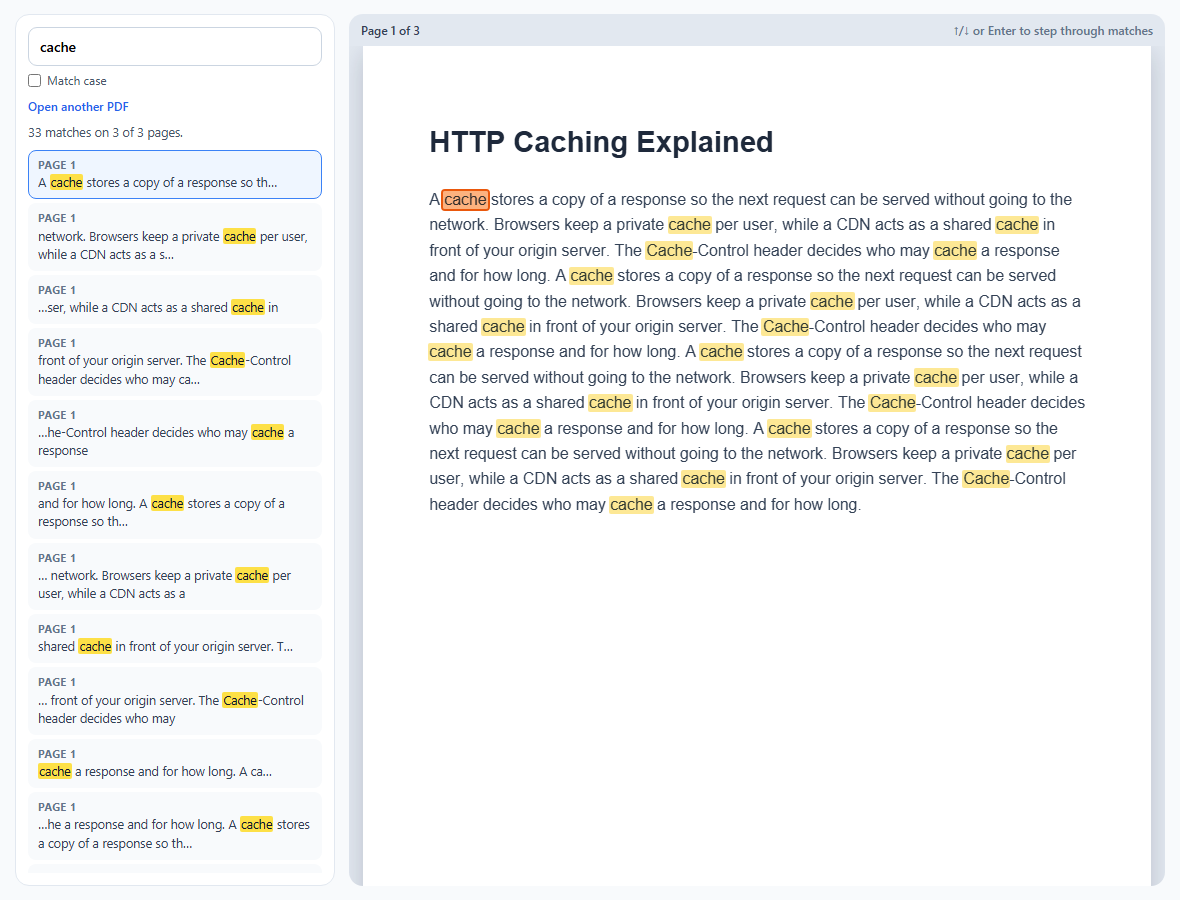
PDF.js Text Search with Highlighted Matches

pdf-lib Watermark and Page Numbers for Existing PDFs
Image Filter Editor HTML CSS JS — CSS Filters
Image Filter Editor · Tools · Plain HTML, CSS & JS · Live preview
Copy & paste
Source Code
<div class="app">
  <div class="left-panel">
    <div class="drop-zone" id="dropZone">
      <div id="placeholder-content">
        <svg width="40" height="40" viewBox="0 0 24 24" fill="none" stroke="#4a90d9" stroke-width="1.5"><rect x="3" y="3" width="18" height="18" rx="3"/><circle cx="8.5" cy="8.5" r="1.5"/><polyline points="21 15 16 10 5 21"/></svg>
        <p>Drop image here<br><small>or click to upload</small></p>
      </div>
      <img id="previewImg" style="display:none">
      <input type="file" id="fileInput" accept="image/*" style="display:none">
    </div>
    <div class="filter-string-wrap">
      <span class="filter-label">CSS filter:</span>
      <code id="filterString">none</code>
    </div>
    <div class="bottom-actions">
      <button id="randomBtn" class="act-btn accent">Random</button>
      <button id="resetBtn" class="act-btn">Reset</button>
      <button id="downloadBtn" class="act-btn">Download</button>
    </div>
  </div>
  <div class="right-panel" id="sliders"></div>
</div>
* { margin: 0; padding: 0; box-sizing: border-box; }
body { background: #1a1a2e; color: #e0e0e0; font-family: system-ui, sans-serif; min-height: 100vh; display: flex; align-items: center; justify-content: center; }
.app { display: flex; gap: 20px; padding: 20px; max-width: 820px; width: 100%; flex-wrap: wrap; justify-content: center; }
.left-panel { display: flex; flex-direction: column; gap: 12px; flex: 0 0 340px; }
.drop-zone {
width: 340px; height: 260px; border: 2px dashed #0f3460; border-radius: 12px;
background: #0d0d1a; display: flex; align-items: center; justify-content: center;
cursor: pointer; overflow: hidden; position: relative; transition: border-color 0.2s;
}
.drop-zone:hover, .drop-zone.dragover { border-color: #4a90d9; }
#placeholder-content { text-align: center; color: #606080; display: flex; flex-direction: column; align-items: center; gap: 10px; }
#placeholder-content p { font-size: 14px; line-height: 1.5; }
#placeholder-content small { font-size: 12px; opacity: 0.7; }
#previewImg { width: 100%; height: 100%; object-fit: contain; display: block; }
.filter-string-wrap {
background: #0d0d1a; border: 1px solid #0f3460; border-radius: 8px;
padding: 8px 12px; display: flex; gap: 8px; align-items: flex-start; flex-wrap: wrap;
}
.filter-label { font-size: 11px; color: #606080; white-space: nowrap; padding-top: 2px; }
#filterString { font-size: 11px; color: #4a90d9; font-family: monospace; word-break: break-all; }
.bottom-actions { display: flex; gap: 8px; }
.act-btn {
flex: 1; padding: 8px; background: #16213e; border: 1px solid #0f3460;
border-radius: 8px; color: #a0a0c0; font-size: 13px; cursor: pointer; transition: all 0.15s;
}
.act-btn:hover { background: #0f3460; color: #e0e0ff; border-color: #4a90d9; }
.act-btn.accent { background: #1a3a6e; border-color: #4a90d9; color: #a0c0ff; }
.act-btn.accent:hover { background: #4a90d9; color: #fff; }
.right-panel { flex: 1; min-width: 240px; display: flex; flex-direction: column; gap: 10px; }
.slider-row { display: flex; flex-direction: column; gap: 4px; }
.slider-row label { display: flex; justify-content: space-between; font-size: 12px; color: #a0a0c0; }
.slider-row label span { color: #e0e0ff; font-size: 11px; font-family: monospace; }
input[type=range] {
-webkit-appearance: none; width: 100%; height: 4px; border-radius: 2px;
background: #0f3460; cursor: pointer; accent-color: #4a90d9;
}
input[type=range]::-webkit-slider-thumb {
-webkit-appearance: none; width: 14px; height: 14px;
border-radius: 50%; background: #4a90d9; cursor: pointer;
}const FILTERS = [
{ name: 'Brightness', prop: 'brightness', min: 50, max: 200, def: 100, unit: '%', label: 'brightness' },
{ name: 'Contrast', prop: 'contrast', min: 50, max: 200, def: 100, unit: '%', label: 'contrast' },
{ name: 'Saturation', prop: 'saturate', min: 0, max: 200, def: 100, unit: '%', label: 'saturate' },
{ name: 'Blur', prop: 'blur', min: 0, max: 10, def: 0, unit: 'px', label: 'blur' },
{ name: 'Hue Rotate', prop: 'hue-rotate', min: 0, max: 360, def: 0, unit: 'deg', label: 'hue-rotate' },
{ name: 'Sepia', prop: 'sepia', min: 0, max: 100, def: 0, unit: '%', label: 'sepia' },
{ name: 'Grayscale', prop: 'grayscale', min: 0, max: 100, def: 0, unit: '%', label: 'grayscale' },
{ name: 'Invert', prop: 'invert', min: 0, max: 100, def: 0, unit: '%', label: 'invert' },
];
const slidersPanel = document.getElementById('sliders');
const previewImg = document.getElementById('previewImg');
const filterString = document.getElementById('filterString');
const inputs = {};
FILTERS.forEach(f => {
const row = document.createElement('div');
row.className = 'slider-row';
row.innerHTML = `<label>${f.name} <span id="val-${f.prop}">—</span></label>
<input type="range" min="${f.min}" max="${f.max}" value="${f.def}" id="sl-${f.prop}">`;
slidersPanel.appendChild(row);
const inp = row.querySelector('input');
inputs[f.prop] = inp;
inp.addEventListener('input', () => applyFilters());
});
function applyFilters() {
const parts = FILTERS.map(f => {
const val = inputs[f.prop].value;
document.getElementById('val-' + f.prop).textContent = val + f.unit;
return `${f.label}(${val}${f.unit})`;
});
const str = parts.join(' ');
previewImg.style.filter = str;
filterString.textContent = str;
}
applyFilters();
const dropZone = document.getElementById('dropZone');
const fileInput = document.getElementById('fileInput');
const ph = document.getElementById('placeholder-content');
function loadFile(file) {
if (!file || !file.type.startsWith('image/')) return;
const reader = new FileReader();
reader.onload = e => {
previewImg.src = e.target.result;
previewImg.style.display = 'block';
ph.style.display = 'none';
applyFilters();
};
reader.readAsDataURL(file);
}
dropZone.addEventListener('click', () => fileInput.click());
fileInput.addEventListener('change', e => loadFile(e.target.files[0]));
dropZone.addEventListener('dragover', e => { e.preventDefault(); dropZone.classList.add('dragover'); });
dropZone.addEventListener('dragleave', () => dropZone.classList.remove('dragover'));
dropZone.addEventListener('drop', e => {
e.preventDefault();
dropZone.classList.remove('dragover');
loadFile(e.dataTransfer.files[0]);
});
document.getElementById('resetBtn').addEventListener('click', () => {
FILTERS.forEach(f => { inputs[f.prop].value = f.def; });
applyFilters();
});
document.getElementById('randomBtn').addEventListener('click', () => {
FILTERS.forEach(f => {
const range = f.max - f.min;
inputs[f.prop].value = Math.floor(f.min + Math.random() * range);
});
applyFilters();
});
document.getElementById('downloadBtn').addEventListener('click', () => {
if (!previewImg.src || !previewImg.naturalWidth) { alert('Please upload an image first.'); return; }
const tmpCanvas = document.createElement('canvas');
tmpCanvas.width = previewImg.naturalWidth;
tmpCanvas.height = previewImg.naturalHeight;
const tmpCtx = tmpCanvas.getContext('2d');
const parts = FILTERS.map(f => `${f.label}(${inputs[f.prop].value}${f.unit})`);
tmpCtx.filter = parts.join(' ');
tmpCtx.drawImage(previewImg, 0, 0);
const a = document.createElement('a');
a.download = 'filtered-image.png';
a.href = tmpCanvas.toDataURL();
a.click();
});Extend with AI
Take This Snippet Further With AI
The AI prompt for this one is for Patreon supporters ($3 a month), along with a site with no ads. Supporters enter the passcode once and it is remembered in this browser.
What's included
Features
About this UI Snippet
How to Build an Image Filter Editor with CSS Filters and Canvas
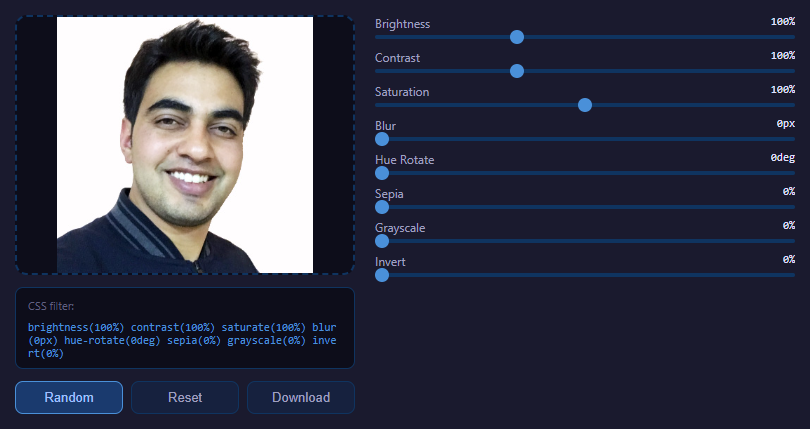
An image filter editor lets users upload a photo, adjust brightness, contrast, saturation, blur, hue, sepia, grayscale and invert with live sliders, and download the edited result. The clever part is that all the heavy lifting is done by the browser's built-in CSS filter engine for the live preview, and by the matching Canvas ctx.filter property for the final export — so there is no per-pixel JavaScript image processing and no library at all. Here is how it is built.
Loading the image with FileReader and drag-and-drop
Images enter the editor two ways. A file input fires a change event, and a drop zone listens for the DataTransfer API events dragover, dragleave and drop. In the drop handler, event.dataTransfer.files[0] gives the dropped file, and event.preventDefault() stops the browser from navigating away to open it. Both paths funnel into a single loader that uses the FileReader API: reader.readAsDataURL(file) reads the image into a base64 data URL, and on reader.onload that URL is assigned to an Image element's src. Reading as a data URL keeps everything client-side — the file never leaves the browser.
Composing the CSS filter string
The editor defines a FILTERS array describing each adjustment: its CSS function name (brightness, contrast, saturate, blur, hue-rotate, sepia, grayscale, invert), the slider range, the default value, and the unit (%, px or deg). Each filter is rendered as a labeled range input.
On any slider change, the code rebuilds a single CSS filter string by mapping over the array: for each filter it produces a token like brightness(120%) or blur(3px), then joins them with spaces into one declaration such as brightness(120%) contrast(110%) saturate(150%) blur(0px) hue-rotate(0deg) sepia(0%) grayscale(0%) invert(0%). Assigning that string to the preview image's style.filter applies every adjustment at once. The order of functions in the string matters — CSS filters are applied left to right, so each operates on the output of the previous — which is why the array order is fixed and meaningful.
Why CSS filters instead of pixel manipulation
A naive editor would call getImageData, loop over millions of bytes adjusting each channel, and putImageData back — slow and complex. By contrast, CSS filters are GPU-accelerated and free: the browser already implements brightness, contrast, hue rotation, sepia matrices and Gaussian blur natively. The live preview updates instantly even on large images because the compositor does the work, and the code stays tiny since it only assembles a string.
Exporting with Canvas ctx.filter
The catch is that style.filter only affects how the element is displayed — it does not change the underlying image data, so you cannot just save the <img>. To produce a real filtered file, the export step draws to a canvas. It creates an offscreen <canvas> sized to the image's naturalWidth and naturalHeight (the true pixel dimensions, not the displayed size), gets the 2D context, and sets ctx.filter to the exact same composed filter string used for the preview. Then ctx.drawImage(previewImg, 0, 0) rasterizes the image through the filter pipeline directly into the canvas bitmap. Because ctx.filter accepts the same syntax as the CSS property, the canvas output is pixel-identical to what the user sees.
Finally the canvas is exported with canvas.toDataURL(), which returns a PNG data URL. A temporary anchor with a download attribute and that URL as its href is clicked programmatically to trigger the browser's save dialog. This canvas-to-anchor pattern is the standard way to download generated images.
Reset and randomize
A reset button restores every slider to its default value from the FILTERS array and rebuilds the filter string, returning the image to its original look. A randomize button assigns each filter a random value within its range and reapplies, which is a fun way to discover combinations. Both simply mutate the slider values and call the same rebuild routine, demonstrating how a single source of truth — the filter string assembled from the inputs — keeps preview, export, reset and randomize perfectly in sync.
A copyable filter string
Because the live CSS filter string is exactly what a developer would paste into a stylesheet, the editor also surfaces it as text. Users can copy the current filter: declaration and drop it straight into their own CSS, making the tool double as a visual generator for CSS filter values.
Altogether the editor shows how to combine the FileReader API, the DataTransfer drag-and-drop API, GPU-accelerated CSS filters for instant preview, and canvas ctx.filter plus toDataURL for true export — a complete, dependency-free image editing flow in a few dozen lines.
Step by step
How to Use
- 1Add an imageDrag a photo onto the drop zone or click to pick one with the file dialog.
- 2Adjust the slidersMove the brightness, contrast, saturate, blur, hue, sepia, grayscale and invert sliders to taste.
- 3Watch the live previewSee changes applied instantly as the composed CSS filter string updates the image.
- 4Try randomizeClick randomize to explore unexpected filter combinations in one tap.
- 5Copy the CSSGrab the generated filter declaration to paste directly into your own stylesheet.
- 6Download the resultClick download to render the filters onto a canvas and save a PNG.
Real-world uses
Common Use Cases
Got questions?
Frequently Asked Questions
CSS filters are implemented natively and GPU-accelerated, so the preview updates instantly with no per-pixel loop. Assembling a filter string is far simpler and faster than calling getImageData and processing millions of bytes by hand.
style.filter only changes how the image is displayed, not the underlying pixel data. To save a truly filtered file you draw the image through ctx.filter onto a canvas, which bakes the effect into the bitmap that toDataURL exports.
Yes. CSS filters apply left to right, each operating on the previous result, so blurring before versus after a hue rotation gives different output. The editor keeps a fixed, meaningful order in its FILTERS array.
No. FileReader reads the file into a local data URL and all processing happens in the browser via CSS and canvas. The image never leaves the device.
Those properties give the image true pixel dimensions rather than its on-screen display size, so the exported PNG is full resolution and not downscaled to the preview dimensions.
Yes. The JSX, Vue, Angular, and Tailwind exports convert it automatically. In React, keep each slider value in useState and build the CSS filter string during render; for download, draw the filtered image to a canvas inside an event handler using ctx.filter before calling toDataURL.