

HTML to PNG Quote Card Designer (html-to-image)

Turndown HTML to Markdown Converter (Paste Rich Text, Get Markdown)
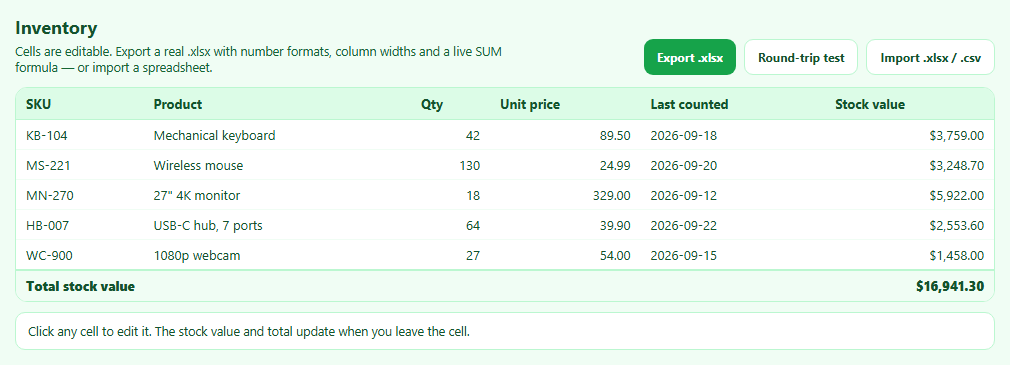
SheetJS Table to Excel Export and Import (.xlsx)
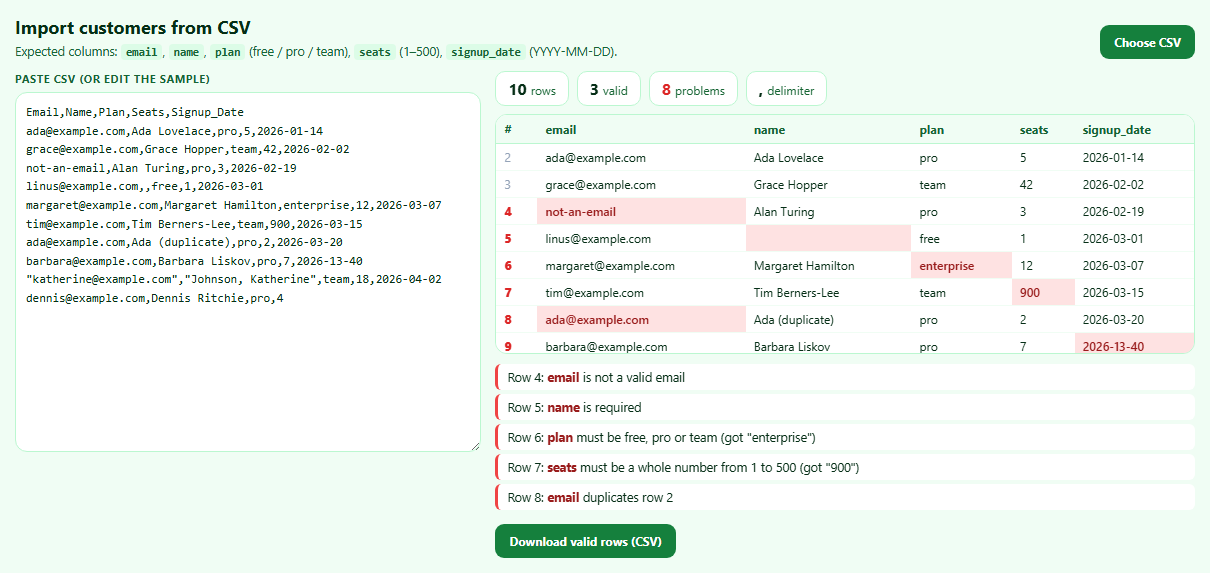
Papa Parse CSV Import Validator with Error Report
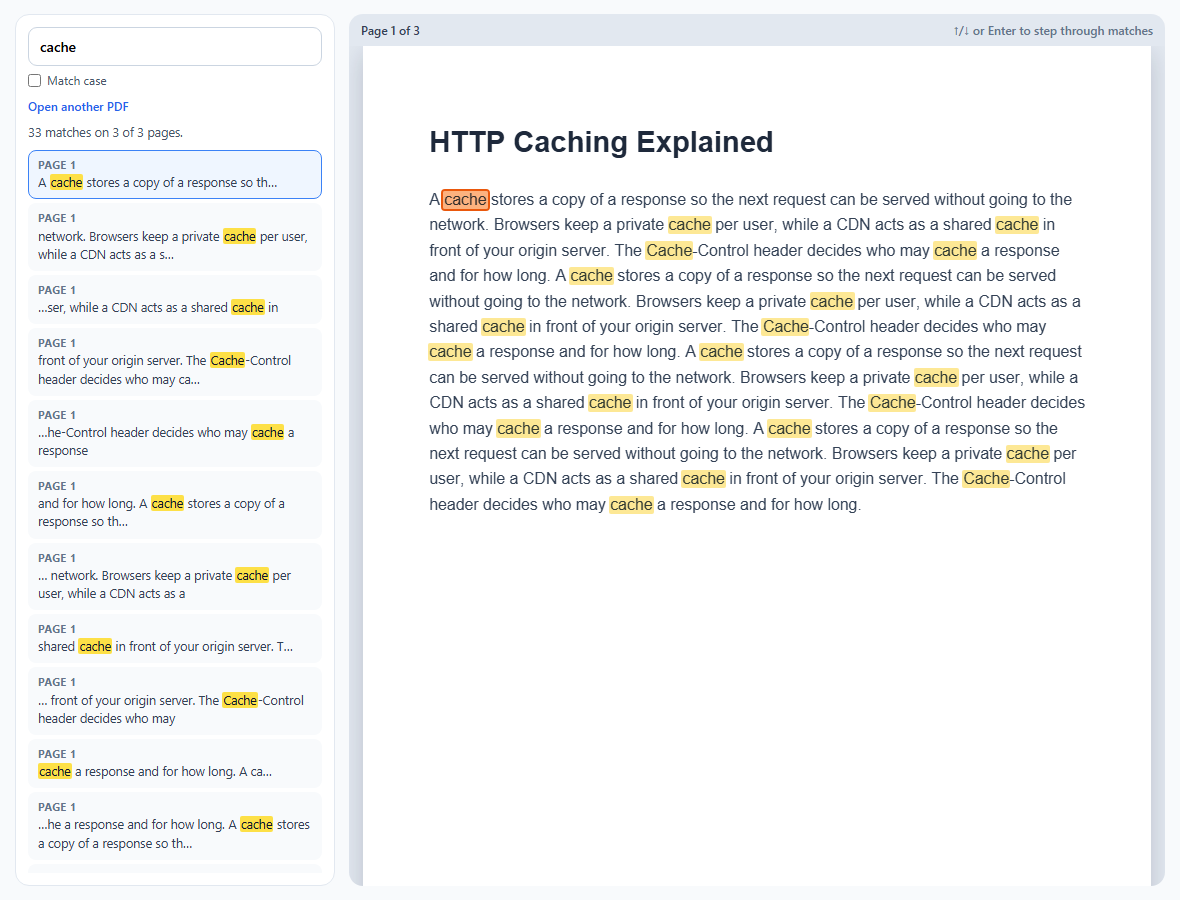
PDF.js Text Search with Highlighted Matches

pdf-lib Watermark and Page Numbers for Existing PDFs
Drawing Canvas HTML CSS JS — Free Drawing Board
Drawing Canvas · Tools · Plain HTML, CSS & JS · Live preview
Copy & paste
Source Code
<div class="app">
  <div class="toolbar">
    <div class="tool-group">
      <button class="tool-btn active" id="btn-brush" title="Brush">
        <svg width="18" height="18" viewBox="0 0 24 24" fill="none" stroke="currentColor" stroke-width="2"><path d="M12 19l7-7 3 3-7 7-3-3z"/><path d="M18 13l-1.5-7.5L2 2l3.5 14.5L13 18l5-5z"/><path d="M2 2l7.586 7.586"/><circle cx="11" cy="11" r="2"/></svg>
      </button>
      <button class="tool-btn" id="btn-eraser" title="Eraser">
        <svg width="18" height="18" viewBox="0 0 24 24" fill="none" stroke="currentColor" stroke-width="2"><path d="M20 20H7L3 16l10-10 7 7-3.5 3.5"/><path d="M6.0001 11L13 18"/></svg>
      </button>
      <button class="tool-btn" id="btn-line" title="Line">
        <svg width="18" height="18" viewBox="0 0 24 24" fill="none" stroke="currentColor" stroke-width="2"><line x1="5" y1="19" x2="19" y2="5"/></svg>
      </button>
      <button class="tool-btn" id="btn-fill" title="Fill Bucket">
        <svg width="18" height="18" viewBox="0 0 24 24" fill="none" stroke="currentColor" stroke-width="2"><path d="M19 11L8.93 1 3.62 6.31l5.1 5.1a2 2 0 0 0 0 2.83l5.66 5.66a2 2 0 0 0 2.83 0l1.79-1.79a2 2 0 0 0 0-2.83L19 11"/><path d="M20 17c0 0 2 1.5 2 2.5a2 2 0 0 1-4 0c0-1 2-2.5 2-2.5z"/></svg>
      </button>
    </div>
    <div class="tool-group">
      <input type="color" id="colorPicker" value="#ffffff" title="Color">
      <div class="size-group">
        <svg width="14" height="14" viewBox="0 0 24 24" fill="currentColor" style="opacity:0.5"><circle cx="12" cy="12" r="4"/></svg>
        <input type="range" id="sizeSlider" min="2" max="40" value="6" title="Brush Size">
        <svg width="14" height="14" viewBox="0 0 24 24" fill="currentColor"><circle cx="12" cy="12" r="10"/></svg>
      </div>
    </div>
    <div class="tool-group">
      <button class="action-btn" id="btn-undo" title="Undo">
        <svg width="16" height="16" viewBox="0 0 24 24" fill="none" stroke="currentColor" stroke-width="2"><polyline points="9 14 4 9 9 4"/><path d="M20 20v-7a4 4 0 0 0-4-4H4"/></svg>
        Undo
      </button>
      <button class="action-btn" id="btn-clear" title="Clear">
        <svg width="16" height="16" viewBox="0 0 24 24" fill="none" stroke="currentColor" stroke-width="2"><polyline points="3 6 5 6 21 6"/><path d="M19 6l-1 14H6L5 6"/><path d="M10 11v6m4-6v6"/></svg>
        Clear
      </button>
      <button class="action-btn" id="btn-download" title="Download PNG">
        <svg width="16" height="16" viewBox="0 0 24 24" fill="none" stroke="currentColor" stroke-width="2"><path d="M21 15v4a2 2 0 0 1-2 2H5a2 2 0 0 1-2-2v-4"/><polyline points="7 10 12 15 17 10"/><line x1="12" y1="15" x2="12" y2="3"/></svg>
        Save
      </button>
    </div>
  </div>
  <div class="canvas-wrap">
    <canvas id="mainCanvas"></canvas>
    <canvas id="overlayCanvas"></canvas>
  </div>
  <div class="status-bar">
    <span id="toolLabel">Brush</span>
    <span id="sizeLabel">Size: 6px</span>
    <span id="posLabel">x: 0, y: 0</span>
  </div>
</div>
* { margin: 0; padding: 0; box-sizing: border-box; }
body { background: #1a1a2e; color: #e0e0e0; font-family: system-ui, sans-serif; height: 100vh; overflow: hidden; }
.app { display: flex; flex-direction: column; height: 100vh; }
.toolbar {
display: flex; align-items: center; gap: 12px; padding: 8px 14px;
background: #16213e; border-bottom: 1px solid #0f3460;
flex-wrap: wrap;
}
.tool-group {
display: flex; align-items: center; gap: 6px;
padding-right: 12px; border-right: 1px solid #0f3460;
}
.tool-group:last-child { border-right: none; }
.tool-btn {
width: 36px; height: 36px; border: 1px solid #0f3460; border-radius: 8px;
background: #1a1a2e; color: #a0a0c0; cursor: pointer;
display: flex; align-items: center; justify-content: center;
transition: all 0.15s;
}
.tool-btn:hover { background: #0f3460; color: #e0e0ff; border-color: #4a90d9; }
.tool-btn.active { background: #4a90d9; color: #fff; border-color: #4a90d9; box-shadow: 0 0 10px rgba(74,144,217,0.4); }
.action-btn {
display: flex; align-items: center; gap: 5px; padding: 6px 12px;
border: 1px solid #0f3460; border-radius: 8px; background: #1a1a2e;
color: #a0a0c0; cursor: pointer; font-size: 13px; transition: all 0.15s;
}
.action-btn:hover { background: #0f3460; color: #e0e0ff; border-color: #4a90d9; }
#colorPicker {
width: 36px; height: 36px; border: 1px solid #0f3460; border-radius: 8px;
background: none; cursor: pointer; padding: 2px;
}
.size-group { display: flex; align-items: center; gap: 6px; }
#sizeSlider {
width: 80px; accent-color: #4a90d9;
-webkit-appearance: none; height: 4px; border-radius: 2px; background: #0f3460; cursor: pointer;
}
#sizeSlider::-webkit-slider-thumb { -webkit-appearance: none; width: 14px; height: 14px; border-radius: 50%; background: #4a90d9; cursor: pointer; }
.canvas-wrap {
flex: 1; position: relative; overflow: hidden;
}
#mainCanvas, #overlayCanvas {
position: absolute; top: 0; left: 0; width: 100%; height: 100%;
}
#overlayCanvas { pointer-events: none; }
.status-bar {
display: flex; justify-content: space-between; padding: 4px 14px;
background: #16213e; border-top: 1px solid #0f3460;
font-size: 12px; color: #606080;
}const mainCanvas = document.getElementById('mainCanvas');
const overlay = document.getElementById('overlayCanvas');
const ctx = mainCanvas.getContext('2d');
const octx = overlay.getContext('2d');
const toolLabel = document.getElementById('toolLabel');
const sizeLabel = document.getElementById('sizeLabel');
const posLabel = document.getElementById('posLabel');
const colorPicker = document.getElementById('colorPicker');
const sizeSlider = document.getElementById('sizeSlider');
let tool = 'brush';
let drawing = false;
let startX = 0, startY = 0;
let history = [];
const MAX_HISTORY = 20;
function resize() {
const wrap = mainCanvas.parentElement;
const w = wrap.clientWidth;
const h = wrap.clientHeight;
const saved = mainCanvas.toDataURL();
mainCanvas.width = w; mainCanvas.height = h;
overlay.width = w; overlay.height = h;
ctx.fillStyle = '#0d0d1a';
ctx.fillRect(0, 0, w, h);
const img = new Image();
img.onload = () => ctx.drawImage(img, 0, 0);
img.src = saved;
}
resize();
window.addEventListener('resize', resize);
function saveHistory() {
if (history.length >= MAX_HISTORY) history.shift();
history.push(mainCanvas.toDataURL());
}
function setTool(t) {
tool = t;
document.querySelectorAll('.tool-btn').forEach(b => b.classList.remove('active'));
document.getElementById('btn-' + t).classList.add('active');
const labels = { brush: 'Brush', eraser: 'Eraser', line: 'Line', fill: 'Fill' };
toolLabel.textContent = labels[t] || t;
mainCanvas.style.cursor = 'crosshair';
}
document.getElementById('btn-brush').addEventListener('click', () => setTool('brush'));
document.getElementById('btn-eraser').addEventListener('click', () => setTool('eraser'));
document.getElementById('btn-line').addEventListener('click', () => setTool('line'));
document.getElementById('btn-fill').addEventListener('click', () => setTool('fill'));
sizeSlider.addEventListener('input', () => {
sizeLabel.textContent = 'Size: ' + sizeSlider.value + 'px';
});
document.getElementById('btn-undo').addEventListener('click', () => {
if (!history.length) return;
const img = new Image();
img.onload = () => {
ctx.clearRect(0, 0, mainCanvas.width, mainCanvas.height);
ctx.drawImage(img, 0, 0);
};
img.src = history.pop();
});
document.getElementById('btn-clear').addEventListener('click', () => {
saveHistory();
ctx.fillStyle = '#0d0d1a';
ctx.fillRect(0, 0, mainCanvas.width, mainCanvas.height);
});
document.getElementById('btn-download').addEventListener('click', () => {
const a = document.createElement('a');
a.download = 'drawing.png';
a.href = mainCanvas.toDataURL();
a.click();
});
function getPos(e) {
const r = mainCanvas.getBoundingClientRect();
const x = (e.clientX - r.left) * (mainCanvas.width / r.width);
const y = (e.clientY - r.top) * (mainCanvas.height / r.height);
return { x, y };
}
function floodFill(x, y, fillColor) {
const imgData = ctx.getImageData(0, 0, mainCanvas.width, mainCanvas.height);
const data = imgData.data;
const px = Math.floor(x), py = Math.floor(y);
const idx = (py * mainCanvas.width + px) * 4;
const tr = data[idx], tg = data[idx+1], tb = data[idx+2], ta = data[idx+3];
const [fr, fg, fb, fa] = fillColor;
if (tr === fr && tg === fg && tb === fb && ta === fa) return;
const stack = [[px, py]];
const w = mainCanvas.width, h = mainCanvas.height;
while (stack.length) {
const [cx, cy] = stack.pop();
const ci = (cy * w + cx) * 4;
if (cx < 0 || cy < 0 || cx >= w || cy >= h) continue;
if (data[ci] !== tr || data[ci+1] !== tg || data[ci+2] !== tb || data[ci+3] !== ta) continue;
data[ci] = fr; data[ci+1] = fg; data[ci+2] = fb; data[ci+3] = fa;
stack.push([cx+1,cy],[cx-1,cy],[cx,cy+1],[cx,cy-1]);
}
ctx.putImageData(imgData, 0, 0);
}
function hexToRgba(hex) {
const r = parseInt(hex.slice(1,3),16);
const g = parseInt(hex.slice(3,5),16);
const b = parseInt(hex.slice(5,7),16);
return [r, g, b, 255];
}
mainCanvas.addEventListener('pointerdown', e => {
mainCanvas.setPointerCapture(e.pointerId);
const { x, y } = getPos(e);
if (tool === 'fill') {
saveHistory();
floodFill(x, y, hexToRgba(colorPicker.value));
return;
}
saveHistory();
drawing = true;
startX = x; startY = y;
if (tool === 'brush' || tool === 'eraser') {
ctx.beginPath();
ctx.moveTo(x, y);
if (tool === 'eraser') {
ctx.globalCompositeOperation = 'destination-out';
} else {
ctx.globalCompositeOperation = 'source-over';
ctx.strokeStyle = colorPicker.value;
}
ctx.lineWidth = +sizeSlider.value;
ctx.lineCap = 'round';
ctx.lineJoin = 'round';
}
});
mainCanvas.addEventListener('pointermove', e => {
const { x, y } = getPos(e);
posLabel.textContent = 'x: ' + Math.floor(x) + ', y: ' + Math.floor(y);
if (!drawing) return;
if (tool === 'brush' || tool === 'eraser') {
ctx.lineTo(x, y);
ctx.stroke();
} else if (tool === 'line') {
octx.clearRect(0, 0, overlay.width, overlay.height);
octx.beginPath();
octx.moveTo(startX, startY);
octx.lineTo(x, y);
octx.strokeStyle = colorPicker.value;
octx.lineWidth = +sizeSlider.value;
octx.lineCap = 'round';
octx.stroke();
}
});
mainCanvas.addEventListener('pointerup', e => {
if (!drawing) return;
drawing = false;
const { x, y } = getPos(e);
if (tool === 'line') {
octx.clearRect(0, 0, overlay.width, overlay.height);
ctx.globalCompositeOperation = 'source-over';
ctx.beginPath();
ctx.moveTo(startX, startY);
ctx.lineTo(x, y);
ctx.strokeStyle = colorPicker.value;
ctx.lineWidth = +sizeSlider.value;
ctx.lineCap = 'round';
ctx.stroke();
}
ctx.globalCompositeOperation = 'source-over';
});Extend with AI
Take This Snippet Further With AI
The AI prompt for this one is for Patreon supporters ($3 a month), along with a site with no ads. Supporters enter the passcode once and it is remembered in this browser.
What's included
Features
About this UI Snippet
How to Build a Drawing Canvas with HTML5 Canvas and JavaScript
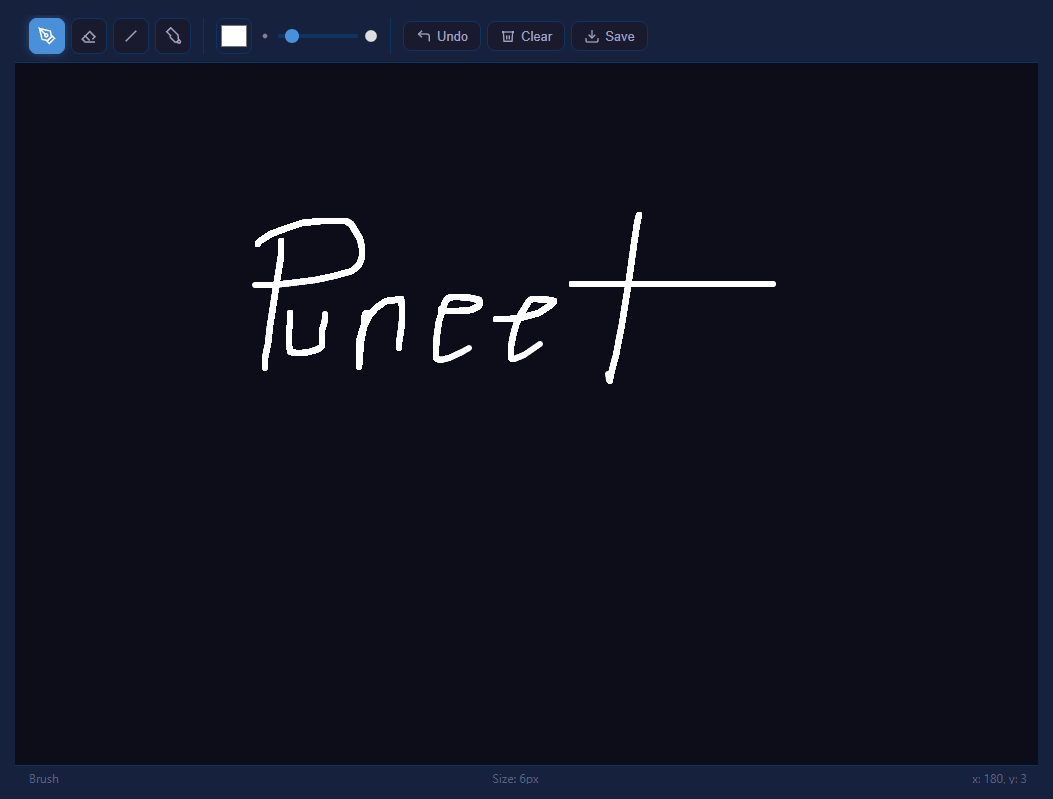
A drawing canvas is a paint-style sketch surface where the user draws freehand strokes with the mouse, finger or stylus, switches between tools like brush, eraser, line and fill bucket, picks colors and brush sizes, undoes mistakes and exports the result as a PNG. This walkthrough explains exactly how the component is built using the HTML5 Canvas 2D API, the Pointer Events API and a small set of pixel-level algorithms, with no external libraries.
The two-canvas architecture
The board uses two stacked <canvas> elements inside a relatively positioned wrapper. The first, mainCanvas, holds the committed artwork. The second, overlayCanvas, sits directly on top with pointer-events: none and is used only as a live preview surface for the line tool, so a rubber-band line can be redrawn every frame without disturbing the real drawing underneath. Both are absolutely positioned at top: 0; left: 0 and sized to 100% of the wrapper, while their internal bitmap resolution is set in JavaScript to match the CSS pixel size.
A critical detail is the resize handler. Setting canvas.width or canvas.height clears the bitmap, so before resizing we snapshot the current image with mainCanvas.toDataURL(), set the new dimensions, repaint the dark background, then load the snapshot into an Image and drawImage it back. This preserves artwork across window resizes. The 2D context is obtained with getContext('2d'); for components that read pixels frequently you would pass { willReadFrequently: true } to hint the browser to keep the buffer in system memory rather than the GPU.
Pointer Events and coordinate mapping
All input is handled through the Pointer Events API (pointerdown, pointermove, pointerup) rather than separate mouse and touch listeners, so a single code path covers mouse, touch and pen. On pointerdown we call mainCanvas.setPointerCapture(e.pointerId) so the element keeps receiving move and up events even when the pointer leaves the canvas mid-stroke — this prevents broken lines when you drag fast past the edge.
Because the canvas bitmap resolution can differ from its displayed CSS size, raw client coordinates must be scaled. The getPos helper reads getBoundingClientRect() and computes x = (e.clientX - rect.left) * (canvas.width / rect.width), mapping screen space into bitmap space so strokes land under the cursor exactly even on high-DPI displays or after resizing.
The tool state machine
A single tool string variable ('brush', 'eraser', 'line', 'fill') drives behavior. setTool updates this variable, toggles the .active class on the toolbar buttons and updates the status label. On each pointerdown the handler branches on tool:
For brush and eraser, we begin a path with ctx.beginPath() and ctx.moveTo(x, y), then on every pointermove we lineTo the new point and stroke(), building a continuous polyline. lineCap and lineJoin are set to round so segments blend into a smooth stroke. The eraser is simply a brush that sets ctx.globalCompositeOperation = 'destination-out', which makes drawing operations remove existing pixels (turning alpha to zero) instead of painting color over them. The brush resets the mode back to source-over.
The line tool and the overlay
The line tool demonstrates why the overlay exists. On pointerdown we record startX, startY. On pointermove we clear the overlay and draw a fresh preview line from the start point to the current point on overlayCanvas only. The user sees the line stretch and rotate in real time, but the main artwork is untouched. On pointerup we clear the overlay and commit the final line to mainCanvas. This is the classic two-layer rubber-band pattern used in vector editors.
The flood fill algorithm
The fill bucket is the most interesting piece. floodFill grabs the entire pixel buffer with ctx.getImageData(0, 0, w, h), giving a flat Uint8ClampedArray where every pixel occupies four bytes (R, G, B, A). It samples the target color at the clicked pixel using the index formula idx = (py * width + px) * 4. If the target color already equals the fill color, it returns early to avoid an infinite loop.
It then runs an iterative stack-based flood fill (an explicit stack instead of recursion to avoid blowing the call stack on large regions). Starting from the clicked pixel, it pops a coordinate, checks bounds, compares that pixel's four channels against the target color, and if they match, overwrites them with the fill color and pushes the four orthogonal neighbors. When the stack empties, the modified buffer is written back with ctx.putImageData(imgData, 0, 0). The fill color comes from hexToRgba, which slices the hex string and parseInt(..., 16) each channel.
Undo via snapshots
Undo is implemented as a bounded history array of data URLs. Before any destructive action (saveHistory) we push mainCanvas.toDataURL() and shift() off the oldest entry once we exceed MAX_HISTORY (20) to cap memory. Undo pop()s the latest snapshot, loads it into an Image, clears the canvas and drawImages it back. Storing full PNG snapshots is simple and robust; a more memory-efficient alternative would store ImageData and putImageData, trading higher RAM for instant restores with no decode step.
Exporting the drawing
Download uses the canvas-to-anchor pattern: create an <a> element, set a.download = 'drawing.png' and a.href = mainCanvas.toDataURL(), then call a.click() to trigger the browser save dialog. toDataURL() defaults to PNG which preserves transparency from the eraser. For very large canvases, canvas.toBlob() with URL.createObjectURL() avoids building a huge base64 string in memory.
Together these techniques — stacked canvases, pointer capture, composite operations, an explicit-stack flood fill and data-URL snapshots — produce a fully functional, dependency-free drawing board you can drop into any page.
Step by step
How to Use
- 1Pick a toolClick brush, eraser, line or fill bucket in the toolbar. The active tool is highlighted and shown in the status bar.
- 2Set color and sizeChoose a color with the native color input and drag the size slider to set stroke width from 2 to 40 pixels.
- 3Draw on the canvasPress and drag to paint freehand. For the line tool, drag to preview a straight line, then release to commit it.
- 4Fill regionsSelect the fill bucket and click any enclosed area to flood it with the current color using a pixel-matching algorithm.
- 5Undo or clearUse Undo to step back through the last 20 snapshots, or Clear to reset the whole board to the background color.
- 6Export your artClick Save to download the canvas as a PNG via a generated data URL anchor.
Real-world uses
Common Use Cases
Got questions?
Frequently Asked Questions
The overlay canvas previews the in-progress line tool every frame without redrawing or corrupting the committed artwork. When the pointer is released, the final line is drawn once onto the main canvas and the overlay is cleared.
It sets ctx.globalCompositeOperation to destination-out. In that mode, drawing operations subtract alpha from existing pixels instead of painting color, effectively erasing. The brush resets the mode back to source-over.
Each snapshot is a full PNG captured with toDataURL, which is simple and reliable. Restoring loads the image and redraws it. For lower memory you could store ImageData objects and use putImageData instead, at the cost of higher RAM usage.
The flood fill matches exact RGBA values. Anti-aliased stroke edges contain semi-transparent pixels that do not match the target color, so fills can bleed through soft boundaries. Drawing fully opaque outlines or adding a color tolerance threshold avoids this.
The pointer coordinates are scaled by canvas.width / boundingRect.width, mapping CSS pixels into the canvas bitmap resolution so the painted point always lands directly under the cursor.
Yes. The JSX, Vue, Angular, and Tailwind exports convert the markup automatically. In React, grab the canvas through a ref, set up the 2D context and pointer listeners in useEffect with cleanup, and keep tool, colour, and brush size in state read by the stroke handlers.