




Hero with Mouse-Parallax Layers — Free HTML CSS JS Snippet
Hero with Mouse-Parallax Layers · Heroes · Plain HTML, CSS & JS · Live preview
Copy & paste
Source Code
<section class="pml-hero" id="pmlHero">
  <div class="pml-layer pml-layer-back" data-depth="0.02">
    <span class="pml-shape pml-shape-1"></span>
    <span class="pml-shape pml-shape-2"></span>
  </div>

  <div class="pml-layer pml-layer-mid" data-depth="0.05">
    <span class="pml-icon pml-icon-1">✦</span>
    <span class="pml-icon pml-icon-2">◆</span>
    <span class="pml-icon pml-icon-3">●</span>
  </div>

  <div class="pml-layer pml-layer-device" data-depth="0.09">
    <div class="pml-device">
      <div class="pml-device-notch"></div>
      <div class="pml-device-screen">
        <div class="pml-device-row"></div>
        <div class="pml-device-row"></div>
        <div class="pml-device-row" style="width:60%"></div>
      </div>
    </div>
  </div>

  <div class="pml-content">
    <span class="pml-eyebrow">Now available on all platforms</span>
    <h1 class="pml-h1">Focus lives<br>in the details</h1>
    <p class="pml-sub">Move your cursor — every layer here drifts at its own depth, closer things reacting more than the ones behind them.</p>
    <a href="#" class="pml-cta">Get the app</a>
  </div>
</section>*{box-sizing:border-box;margin:0;padding:0}
body{font-family:system-ui,-apple-system,sans-serif;background:#0a0a12;color:#f1f5f9}
.pml-hero{position:relative;min-height:100vh;display:flex;align-items:center;justify-content:center;overflow:hidden}
.pml-layer{position:absolute;inset:0;pointer-events:none;will-change:transform}
.pml-shape{position:absolute;border-radius:50%;filter:blur(50px);opacity:.55}
.pml-shape-1{width:420px;height:420px;background:#6366f1;top:-80px;left:-60px}
.pml-shape-2{width:340px;height:340px;background:#ec4899;bottom:-60px;right:-40px}
.pml-icon{position:absolute;font-size:28px;color:rgba(255,255,255,.18)}
.pml-icon-1{top:18%;left:12%}
.pml-icon-2{top:65%;left:80%;font-size:22px}
.pml-icon-3{top:78%;left:18%;font-size:16px}
.pml-layer-device{display:flex;align-items:center;justify-content:center}
.pml-device{width:200px;height:260px;border-radius:26px;background:linear-gradient(160deg,#1e2233,#12141f);border:1px solid rgba(255,255,255,.1);box-shadow:0 30px 70px rgba(0,0,0,.5);padding:14px;transform:translateY(-10px)}
.pml-device-notch{width:44px;height:6px;border-radius:4px;background:rgba(255,255,255,.15);margin:0 auto 14px}
.pml-device-screen{background:#0a0d16;border-radius:14px;height:calc(100% - 20px);padding:16px;display:flex;flex-direction:column;gap:10px}
.pml-device-row{height:8px;border-radius:4px;background:linear-gradient(90deg,#818cf8,#c084fc);width:85%}
.pml-content{position:relative;z-index:2;text-align:center;display:flex;flex-direction:column;align-items:center;gap:16px;padding:24px;max-width:600px}
.pml-eyebrow{font-size:12px;font-weight:700;letter-spacing:.08em;text-transform:uppercase;color:#a5b4fc}
.pml-h1{font-size:clamp(32px,5.8vw,58px);font-weight:800;line-height:1.1;letter-spacing:-.02em}
.pml-sub{font-size:15.5px;color:#94a3b8;line-height:1.7;max-width:460px}
.pml-cta{margin-top:4px;background:#818cf8;color:#0e0a1f;font-weight:700;font-size:15px;padding:12px 28px;border-radius:9px;text-decoration:none;box-shadow:0 6px 22px rgba(129,140,248,.32);transition:transform .15s}
.pml-cta:hover{transform:translateY(-2px)}
@media (max-width:640px){.pml-layer-device{display:none}}// Real cursor-tracked parallax: each layer's offset is computed live from mouse position and its own depth factor.
const hero = document.getElementById('pmlHero');
const layers = Array.from(document.querySelectorAll('.pml-layer'));
let targetX = 0, targetY = 0; // -1..1 normalized cursor offset from center
let currentX = 0, currentY = 0; // smoothed values actually applied to transforms
function onMove(e) {
const rect = hero.getBoundingClientRect();
const px = (e.clientX - rect.left) / rect.width; // 0..1
const py = (e.clientY - rect.top) / rect.height; // 0..1
targetX = (px - 0.5) * 2; // -1..1
targetY = (py - 0.5) * 2; // -1..1
}
function onLeave() {
targetX = 0;
targetY = 0;
}
hero.addEventListener('pointermove', onMove);
hero.addEventListener('pointerleave', onLeave);
// Smoothly ease current values toward the target each frame, then apply per-layer depth offsets.
function animate() {
currentX += (targetX - currentX) * 0.08;
currentY += (targetY - currentY) * 0.08;
layers.forEach((layer) => {
const depth = parseFloat(layer.dataset.depth); // each layer moves proportionally to its own depth
const maxShift = 60; // px, scaled by depth
const shiftX = currentX * maxShift * (depth * 10);
const shiftY = currentY * maxShift * (depth * 10);
layer.style.transform = `translate3d(${shiftX}px, ${shiftY}px, 0)`;
});
requestAnimationFrame(animate);
}
requestAnimationFrame(animate);Extend with AI
Take This Snippet Further With AI
The AI prompt for this one is for Patreon supporters ($3 a month), along with a site with no ads. Supporters enter the passcode once and it is remembered in this browser.
What's included
Features
About this UI Snippet
Hero with Mouse-Parallax Layers — Real Depth From Live Cursor Position
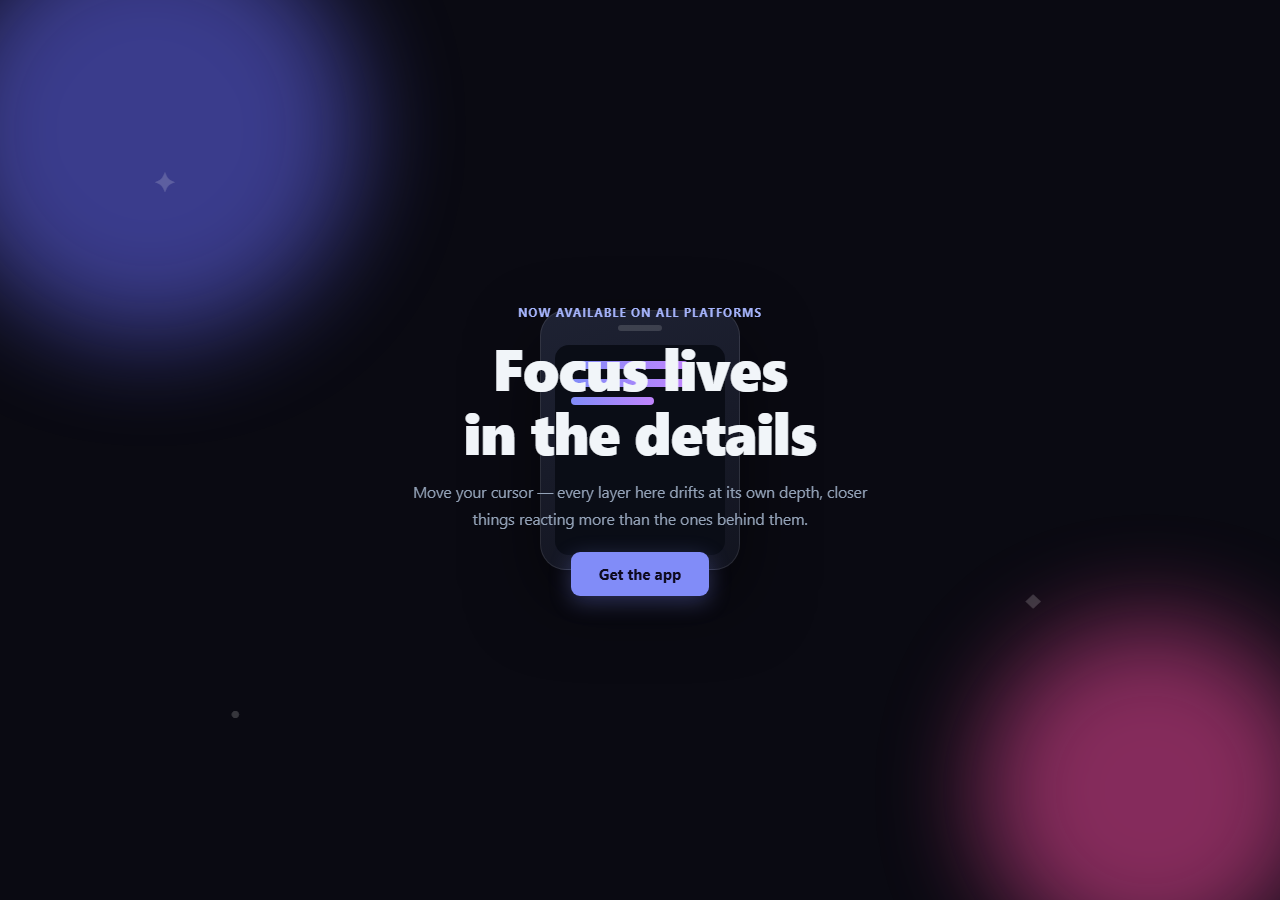
Parallax depth only reads as "real" when closer elements genuinely move more than distant ones in response to the same cursor movement — not when several layers loop independent CSS animations that happen to run at different speeds. This snippet computes every layer's offset from one shared cursor position on every animation frame, scaled by each layer's own depth factor.
One cursor position, three depth factors
onMove() normalizes the cursor's position within the hero to a -1..1 range on both axes (targetX, targetY) — center is (0,0), an edge is ±1. Three layers (.pml-layer-back, .pml-layer-mid, .pml-layer-device) each carry a data-depth attribute (0.02, 0.05, 0.09). Inside the render loop, every layer's pixel shift is currentX * maxShift * (depth * 10) — the *same* cursor position feeding three different multipliers, so the device mockup (highest depth) visibly moves several times farther than the background blobs (lowest depth) for identical cursor movement. That ratio, not just "some things move," is what makes it read as depth rather than three unrelated wobbles.
Eased toward the target, not snapped to it
Rather than setting each layer's transform directly to the raw cursor position, currentX/currentY chase targetX/targetY with simple exponential smoothing (current += (target - current) * 0.08) inside a requestAnimationFrame loop that runs continuously. This produces the soft, slightly-lagging drift real parallax has — a layer catching up to where the cursor now is, rather than teleporting to a new position on every mouse event.
Why requestAnimationFrame and not the pointermove handler directly
The pointermove listener only updates the lightweight targetX/targetY numbers; the actual DOM writes (layer.style.transform) happen inside the separate animate() loop, decoupled from event frequency. This means the visual update rate is capped to the display's real refresh rate regardless of how often pointermove fires, and the easing math has a consistent per-frame timestep to work against.
translate3d and will-change for cheap compositing
Every layer moves via translate3d(x, y, 0) (not top/left), which the browser can composite on the GPU without triggering layout, and will-change: transform hints the compositor to keep the layer on its own paint layer ahead of time.
A resting state on pointer leave
onLeave() resets targetX/targetY to zero, and because the same easing loop is always running, every layer glides back to its resting position rather than snapping — the leave state reuses the identical animation path as normal movement.
Customizing it
Add more layers with their own data-depth values (the loop reads them generically), tune maxShift or the 0.08 easing factor for snappier or dreamier motion, and swap the CSS-drawn device mockup for a real product screenshot. Pair it with parallax hero or hero parallax grid for scroll-driven parallax variants instead of cursor-driven.
Step by step
How to Use
- 1Paste HTML, CSS, and JSThree layered elements sit centered at rest.
- 2Move the cursor over the heroEach layer drifts toward the opposite side, the device layer moving noticeably more than the back layer.
- 3Move the cursor to an edgeOffsets scale up smoothly, capped by maxShift and each layer's own depth.
- 4Move the cursor off the heroAll layers ease back to rest via the same animation loop.
- 5Add a new layerGive it a data-depth attribute — the render loop picks it up automatically.
- 6Tune the feelAdjust maxShift or the 0.08 easing factor in animate().
Real-world uses
Common Use Cases
requestAnimationFrame decoupling DOM writes from raw pointermove frequency.translate3d and will-change for cheap transforms.Got questions?
Frequently Asked Questions
Every layer element carries a data-depth attribute (0.02, 0.05, 0.09 for the back, mid, and device layers). Inside the shared animation loop, each layer's pixel offset is computed as the same smoothed cursor position multiplied by maxShift and that layer's own depth factor — so all three layers respond to the identical cursor input, just scaled differently, which is what produces a real sense of relative depth rather than independent motion.
The pointermove handler only updates lightweight target values (targetX, targetY). A separate requestAnimationFrame loop eases a second pair of current values toward those targets on every frame using simple exponential smoothing (current += (target - current) * 0.08), and only the smoothed current values are ever written to a layer's transform — so the visual motion always trails slightly behind the raw cursor position instead of teleporting to it.
Decoupling the DOM writes from the pointermove event means the visual update rate is capped to the display's real repaint cycle rather than however often pointermove happens to fire (which can be very high-frequency on some devices), and it gives the easing math a consistent loop to run continuously against, including the ability to animate back to rest after the pointer leaves.
translate3d (even with a 0 z-value) promotes the element onto its own GPU compositor layer and animates without triggering layout recalculation or repaint of surrounding content, unlike changing left/top which forces the browser to recompute layout on every frame. Combined with will-change: transform, this keeps the parallax smooth even with several layers animating simultaneously.
Add a new .pml-layer element with its own data-depth value (a larger number moves more, a smaller number moves less) and put your shapes, icons, or mockup markup inside it with position: absolute or centered flex layout as needed. Since the animation loop selects all .pml-layer elements generically and reads each one's own data-depth, no JavaScript changes are required.