


Context Menu — Free HTML CSS JS Right-Click Snippet
Context Menu · Navigation · Plain HTML, CSS & JS · Live preview
Copy & paste
Source Code
<div class="stage" id="stage" oncontextmenu="showMenu(event)">
  <div class="instructions">
    <svg width="20" height="20" viewBox="0 0 24 24" fill="none" stroke="currentColor" stroke-width="2"><path d="M18 11V6a2 2 0 0 0-2-2v0a2 2 0 0 0-2 2v0"/><path d="M14 10V4a2 2 0 0 0-2-2v0a2 2 0 0 0-2 2v0"/><path d="M10 10.5V6a2 2 0 0 0-2-2v0a2 2 0 0 0-2 2v0"/><path d="M18 11a2 2 0 0 1 4 0v3a8 8 0 0 1-16 0V5"/></svg>
    Right-click anywhere in this area
  </div>
</div>

<ul class="ctx-menu" id="ctx">
  <li onclick="action('Copy')"><svg width="14" height="14" viewBox="0 0 24 24" fill="none" stroke="currentColor" stroke-width="2"><rect x="9" y="9" width="13" height="13" rx="2"/><path d="M5 15H4a2 2 0 0 1-2-2V4a2 2 0 0 1 2-2h9a2 2 0 0 1 2 2v1"/></svg>Copy</li>
  <li onclick="action('Cut')"><svg width="14" height="14" viewBox="0 0 24 24" fill="none" stroke="currentColor" stroke-width="2"><circle cx="6" cy="6" r="3"/><circle cx="6" cy="18" r="3"/><line x1="20" y1="4" x2="8.12" y2="15.88"/><line x1="14.47" y1="14.48" x2="20" y2="20"/><line x1="8.12" y1="8.12" x2="12" y2="12"/></svg>Cut</li>
  <li onclick="action('Paste')"><svg width="14" height="14" viewBox="0 0 24 24" fill="none" stroke="currentColor" stroke-width="2"><path d="M16 4h2a2 2 0 0 1 2 2v14a2 2 0 0 1-2 2H6a2 2 0 0 1-2-2V6a2 2 0 0 1 2-2h2"/><rect x="8" y="2" width="8" height="4" rx="1"/></svg>Paste</li>
  <li class="divider"></li>
  <li onclick="action('Rename')"><svg width="14" height="14" viewBox="0 0 24 24" fill="none" stroke="currentColor" stroke-width="2"><path d="M11 4H4a2 2 0 0 0-2 2v14a2 2 0 0 0 2 2h14a2 2 0 0 0 2-2v-7"/><path d="M18.5 2.5a2.121 2.121 0 0 1 3 3L12 15l-4 1 1-4 9.5-9.5z"/></svg>Rename</li>
  <li onclick="action('Share')"><svg width="14" height="14" viewBox="0 0 24 24" fill="none" stroke="currentColor" stroke-width="2"><circle cx="18" cy="5" r="3"/><circle cx="6" cy="12" r="3"/><circle cx="18" cy="19" r="3"/><line x1="8.59" y1="13.51" x2="15.42" y2="17.49"/><line x1="15.41" y1="6.51" x2="8.59" y2="10.49"/></svg>Share</li>
  <li class="divider"></li>
  <li class="danger" onclick="action('Delete')"><svg width="14" height="14" viewBox="0 0 24 24" fill="none" stroke="currentColor" stroke-width="2"><polyline points="3 6 5 6 21 6"/><path d="M19 6l-1 14H6L5 6"/><path d="M10 11v6M14 11v6"/></svg>Delete</li>
</ul>
* { box-sizing: border-box; margin: 0; padding: 0; }
body { font-family: system-ui, sans-serif; background: #f1f5f9; }
.stage { min-height: 100vh; display: flex; align-items: center; justify-content: center; user-select: none; }
.instructions { display: flex; align-items: center; gap: 10px; font-size: 14px; color: #94a3b8; font-weight: 500; border: 1.5px dashed #e2e8f0; padding: 24px 32px; border-radius: 12px; background: #fff; }
.ctx-menu {
position: fixed; list-style: none;
background: #fff; border: 1px solid #e2e8f0;
border-radius: 10px; padding: 4px;
min-width: 170px;
box-shadow: 0 10px 32px rgba(0,0,0,0.12);
opacity: 0; pointer-events: none;
transform: scale(0.95);
transform-origin: top left;
transition: opacity 0.12s, transform 0.12s;
z-index: 999;
}
.ctx-menu.show { opacity: 1; pointer-events: all; transform: scale(1); }
.ctx-menu li {
display: flex; align-items: center; gap: 8px;
padding: 8px 10px; font-size: 13px; font-weight: 500;
color: #475569; border-radius: 6px; cursor: pointer;
transition: background 0.1s, color 0.1s;
}
.ctx-menu li:hover { background: #f1f5f9; color: #1e293b; }
.ctx-menu li.danger { color: #dc2626; }
.ctx-menu li.danger:hover { background: #fef2f2; }
.ctx-menu li.divider { height: 1px; background: #f1f5f9; margin: 3px 0; padding: 0; cursor: default; }
.ctx-menu li.divider:hover { background: #f1f5f9; }const menu = document.getElementById('ctx');
function showMenu(e) {
e.preventDefault();
const x = Math.min(e.clientX, window.innerWidth - 180);
const y = Math.min(e.clientY, window.innerHeight - 240);
menu.style.left = x + 'px';
menu.style.top = y + 'px';
menu.classList.add('show');
}
function action(name) {
alert(name + ' clicked');
menu.classList.remove('show');
}
document.addEventListener('click', () => menu.classList.remove('show'));
document.addEventListener('keydown', e => { if (e.key === 'Escape') menu.classList.remove('show'); });Extend with AI
Take This Snippet Further With AI
The AI prompt for this one is for Patreon supporters ($3 a month), along with a site with no ads. Supporters enter the passcode once and it is remembered in this browser.
What's included
Features
About this UI Snippet
Context Menu — contextmenu Event, Viewport Clamping, Pop-in Animation & Three Close Methods
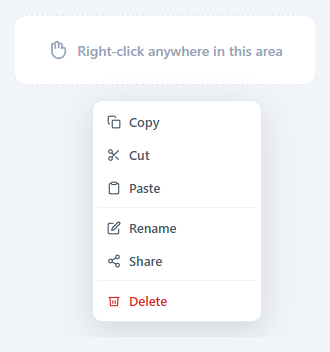
A context menu is the floating menu that appears when a user right-clicks (or long-presses on touch). It surfaces contextual actions relevant to the specific element that was right-clicked — Copy, Paste, Rename, Delete — without consuming any permanent screen space, like a click-triggered dropdown menu. Context menus are a staple of desktop-class web interfaces: file managers, data tables, spreadsheet editors, image editors, map applications, and any interface that aims to match native application interactions.
The contextmenu event and preventDefault
The document.addEventListener('contextmenu', showMenu) listener intercepts every right-click on the stage area. e.preventDefault() is the critical line — without it, the browser's built-in context menu appears on top of the custom one. After prevention, e.clientX and e.clientY give the cursor position relative to the viewport, which becomes the menu's top-left position.
Viewport edge clamping
A context menu positioned directly at clientX, clientY will overflow the right or bottom edge when the user right-clicks near a viewport boundary. The clamping calculation prevents this: const x = Math.min(e.clientX, window.innerWidth - 180) — 180 is the menu's minimum width. If the cursor is within 180px of the right edge, the menu is shifted left to fit. Similarly for Y: Math.min(e.clientY, window.innerHeight - 240) — 240 is the approximate menu height. This calculation is a common source of bugs in context menu implementations that skip it and only discover the issue during testing near edges.
The pop-in animation from the click point
The menu has default CSS transform: scale(0.95); opacity: 0; pointer-events: none; transition: opacity 0.12s, transform 0.12s. Adding .show transitions to transform: scale(1); opacity: 1; pointer-events: all. The transform-origin: top left anchors the scale animation to the menu's top-left corner — which is closest to the cursor position — making the menu appear to grow outward from the click point. This feels more natural than a centre-origin scale or a slide animation.
Three dismissal mechanisms
Well-implemented context menus have three ways to close: clicking a menu item (which performs an action then dismisses), clicking anywhere outside the menu (the standard dismiss gesture), and pressing the Escape key (keyboard-accessible dismiss). The document.addEventListener('click', ...) listener removes .show on any click. The document.addEventListener('keydown', e => { if (e.key === 'Escape') ... }) handles keyboard dismiss. Each menu item's onclick handler calls menu.classList.remove('show') after performing its action.
Danger item styling
The Delete item has a .danger class that applies color: #dc2626 (red) and background: #fef2f2 on hover, following the universal convention that destructive actions are shown in red to warn users before they click.
Step by step
How to Use
- 1Right-click anywhere in the dashed stage areaRight-click in the stage area to open the context menu at the cursor position. The menu pops in with a scale + opacity animation from its top-left corner. Click a menu item, click outside, or press Escape to close it. Try right-clicking near the edge of the preview to see the viewport clamping in action.
- 2Click a menu item to see the action and dismissClick any menu item (Copy, Cut, Paste, Rename, Share, Delete) to trigger an alert with the item name and automatically dismiss the menu. In your implementation, replace the alert() call inside the action() function with your actual handler logic for each item.
- 3Add, remove, or reorder menu items in the HTMLIn the HTML panel, each <li> inside .ctx-menu is a menu item. Add new items by copying an existing li and updating the SVG icon and text. The .divider class on a li creates a horizontal separator line. The .danger class on the Delete item applies the red destructive-action styling.
- 4Bind to a specific element instead of the whole documentIn the JS panel, change the contextmenu listener target from the stage element's oncontextmenu attribute to a specific element: myElement.addEventListener('contextmenu', showMenu). This shows the menu only when right-clicking that specific element. Use event delegation with e.target.closest() for dynamic elements in lists or tables.
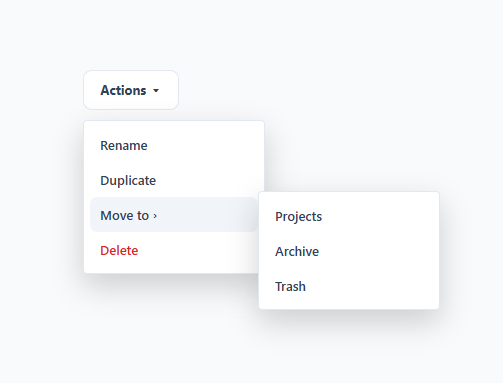
- 5Add a submenu to a menu itemAdd a nested .ctx-menu ul as a child of a li item. In CSS, set the nested menu to display: none by default and display: block on .has-submenu:hover .ctx-menu. Position it with left: 100%; top: 0 to open to the right of the parent item. Add the viewport clamping logic to detect when the submenu would overflow the right edge and flip it to left: -100%.
- 6Export as HTML, JSX, or Tailwind for your projectClick HTML for a standalone file ready to use in any web project, JSX for a React ContextMenu component with onContextMenu, x, y, and items props, or Tailwind for a Tailwind CSS version. The JSX export manages visibility via useState and attaches close listeners via useEffect with cleanup on unmount.
Real-world uses
Common Use Cases
Got questions?
Frequently Asked Questions
The showMenu function calculates the clamped position before setting the menu's left and top: const x = Math.min(e.clientX, window.innerWidth - 180) prevents the menu from overflowing the right edge by capping the left position so the full 180px-wide menu fits. const y = Math.min(e.clientY, window.innerHeight - 240) prevents bottom overflow for the approximate 240px menu height. Both values use Math.min — if the cursor position leaves enough room, the menu appears at the cursor; if not, it is shifted inward just enough to fit. This ensures the menu is always fully visible regardless of where in the viewport the user right-clicks.
The .ctx-menu element has transform: scale(0.95); opacity: 0 in its default state, combined with transition: opacity 0.12s, transform 0.12s and pointer-events: none. Adding the .show class changes these to transform: scale(1); opacity: 1; pointer-events: all, triggering the CSS transition. The transform-origin: top left is critical — it anchors the scale animation to the top-left corner of the menu, which is the corner closest to the cursor (since the menu opens to the right and below the click point). Without this, the menu would scale from its geometric center, creating a floating animation that doesn't feel attached to the click position.
Use event delegation with e.target.closest() to detect which element type was right-clicked. In the showMenu function: const fileEl = e.target.closest('[data-type="file"]'); const rowEl = e.target.closest('[data-type="row"]'); Then render different menu items based on which element matched. An elegant pattern is to store menu item definitions per type in an object: const menuItems = { file: [{label:'Copy',...},{label:'Delete',...}], row: [{label:'Edit',...},...] }. Pass the matched type to a renderMenu() function that populates the ul from the correct items array.
The contextmenu event does not fire consistently on touch devices. For mobile context menus, add a touchstart listener that starts a 500ms timer: const timer = setTimeout(() => showMenu(touch.clientX, touch.clientY), 500). In touchend and touchmove listeners, call clearTimeout(timer) to cancel if the user lifts their finger or moves before 500ms. On iOS, also call e.preventDefault() in touchstart to prevent the browser's default callout menu from appearing. This pattern reliably detects long-press and is the standard technique for touch-based contextual menus.
Yes. While the Context Menu snippet gives you one pattern to copy, the free Responsive Navbar Builder at webdevpuneet.com/navbar-builder/ designs a whole navigation bar: logo, links and dropdown menus, a mobile hamburger menu (dropdown panel, slide-in drawer or full screen) and a scroll effect (sticky, shrink, hide on scroll or transparent). It has six presets, a live preview that runs the real code, and exports HTML + CSS + vanilla JS, React, Tailwind, Vue 3 or Angular — or you can click Fork & Edit to keep editing it in My Code.