

Quill Rich Text Editor with Custom Toolbar and Character Limit

CodeMirror JSON Editor with Validation Gutter
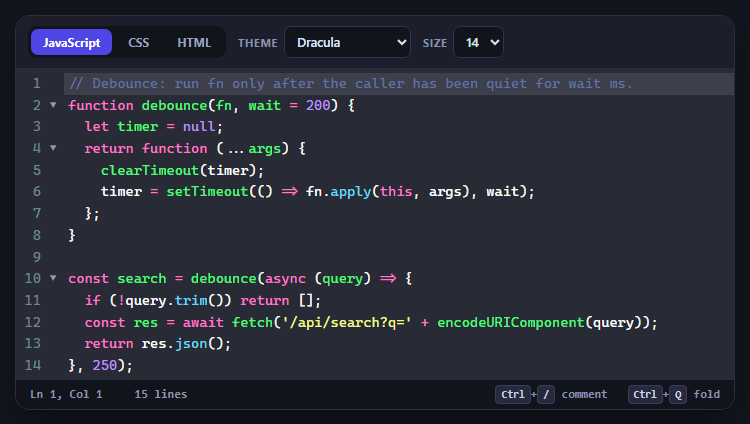
CodeMirror Code Editor with Line Numbers, Folding and Themes

Marked + DOMPurify Live Markdown Preview
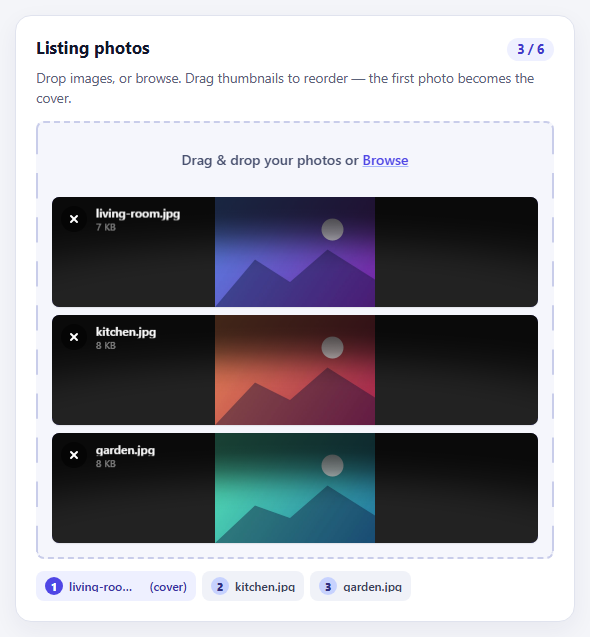
FilePond Image Upload with Preview and Reorder

Cropper.js Aspect-Ratio Presets for Social Posts
Multi-Step Form — Free HTML CSS JS Wizard Snippet
Multi-step Form · Forms · Plain HTML, CSS & JS · Live preview
Copy & paste
Source Code
<div class="wizard">
  <div class="progress">
    <div class="step-dot active" id="d1">1</div>
    <div class="line" id="l1"></div>
    <div class="step-dot" id="d2">2</div>
    <div class="line" id="l2"></div>
    <div class="step-dot" id="d3">3</div>
  </div>

  <div class="step active" id="s1">
    <h3>Personal Info</h3>
    <div class="fields">
      <input type="text" placeholder="First name" />
      <input type="text" placeholder="Last name" />
      <input type="email" placeholder="Email address" />
    </div>
  </div>

  <div class="step" id="s2">
    <h3>Account Setup</h3>
    <div class="fields">
      <input type="text" placeholder="Username" />
      <input type="password" placeholder="Password" />
      <input type="password" placeholder="Confirm password" />
    </div>
  </div>

  <div class="step" id="s3">
    <h3>All Done! 🎉</h3>
    <p class="confirm-msg">Your account has been created successfully. Check your email for the verification link.</p>
    <div class="confirm-icon">✓</div>
  </div>

  <div class="actions">
    <button class="btn ghost" id="back-btn" onclick="prevStep()" style="display:none">Back</button>
    <button class="btn solid" id="next-btn" onclick="nextStep()">Next →</button>
  </div>
</div>
* { box-sizing: border-box; margin: 0; padding: 0; }
body { font-family: system-ui, sans-serif; background: #f8fafc; display: flex; align-items: center; justify-content: center; min-height: 100vh; padding: 20px; }
.wizard { background: #fff; border-radius: 18px; padding: 28px 24px; width: 340px; box-shadow: 0 4px 24px rgba(0,0,0,0.08); display: flex; flex-direction: column; gap: 24px; }
.progress { display: flex; align-items: center; }
.step-dot { width: 32px; height: 32px; border-radius: 50%; border: 2px solid #e2e8f0; background: #fff; display: flex; align-items: center; justify-content: center; font-size: 12px; font-weight: 700; color: #94a3b8; flex-shrink: 0; transition: all 0.25s; }
.step-dot.active { border-color: #6366f1; color: #6366f1; background: #eef2ff; }
.step-dot.done { border-color: #6366f1; background: #6366f1; color: #fff; }
.line { flex: 1; height: 2px; background: #e2e8f0; transition: background 0.25s; }
.line.done { background: #6366f1; }
.step { display: none; flex-direction: column; gap: 14px; }
.step.active { display: flex; animation: slideIn 0.2s ease; }
@keyframes slideIn { from { opacity:0; transform:translateX(12px); } to { opacity:1; transform:none; } }
h3 { font-size: 16px; font-weight: 700; color: #1e293b; }
.fields { display: flex; flex-direction: column; gap: 10px; }
.fields input { padding: 10px 13px; font-size: 13px; font-family: inherit; border: 1.5px solid #e2e8f0; border-radius: 8px; outline: none; color: #1e293b; transition: border-color 0.15s; }
.fields input:focus { border-color: #6366f1; }
.confirm-msg { font-size: 13px; color: #64748b; line-height: 1.65; }
.confirm-icon { font-size: 40px; text-align: center; color: #16a34a; }
.actions { display: flex; gap: 10px; justify-content: flex-end; }
.btn { padding: 9px 20px; font-size: 13px; font-weight: 600; border-radius: 8px; cursor: pointer; font-family: inherit; transition: all 0.15s; }
.btn.solid { background: #6366f1; color: #fff; border: none; }
.btn.solid:hover { background: #4f46e5; }
.btn.ghost { background: none; color: #475569; border: 1.5px solid #e2e8f0; }
.btn.ghost:hover { border-color: #6366f1; color: #6366f1; }let cur = 1;
const total = 3;
function update() {
for (let i = 1; i <= total; i++) {
document.getElementById('s'+i).classList.toggle('active', i === cur);
const dot = document.getElementById('d'+i);
dot.classList.toggle('active', i === cur);
dot.classList.toggle('done', i < cur);
dot.textContent = i < cur ? '✓' : i;
if (i < total) document.getElementById('l'+i).classList.toggle('done', i < cur);
}
document.getElementById('back-btn').style.display = cur > 1 ? 'block' : 'none';
const nextBtn = document.getElementById('next-btn');
nextBtn.textContent = cur === total - 1 ? 'Submit ✓' : cur === total ? 'Done' : 'Next →';
if (cur === total) nextBtn.style.background = '#16a34a';
}
function nextStep() { if (cur < total) { cur++; update(); } }
function prevStep() { if (cur > 1) { cur--; update(); } }Extend with AI
Take This Snippet Further With AI
The AI prompt for this one is for Patreon supporters ($3 a month, 7 days free), along with a site with no ads. Supporters enter the passcode once and it is remembered in this browser.
What's included
Features
About this UI Snippet
Multi-Step Form — cur Variable, Dot Active/Done States & Step Panel Switching
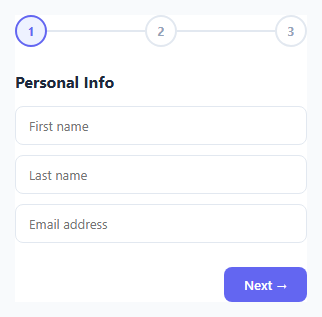
A multi-step form breaks a long form into manageable sections — account details, personal info, and confirmation — displayed one at a time, as in a checkout form or progress wizard. The stepper indicator at the top shows progress through the sections, reducing the cognitive load of a large single-page form.
The cur variable and update()
let cur = 1 tracks the current step (1-indexed). update() runs after every Next or Back click. For each step index i, it: shows/hides the step panel via .active class, updates the dot via .active (current) and .done (completed), and sets the dot's textContent to '✓' for done steps or the step number for active/pending. Back/Next buttons have boundary guards — Back is disabled at step 1, Next changes to Submit at step 3.
The dot stepper
Each dot is a 32px circle. .step-dot.active applies accent colour border and text. .step-dot.done applies filled accent background with white tick. The connecting lines between dots fill with accent colour for completed steps.
Step panel switching
Each .step-content panel has display: none by default. Adding .active switches to display: flex. Only one panel is active at a time — update() iterates all panels and sets the class based on the index comparison.
Validation before advancing
In a production form, validate the current step's fields before calling next(). If validation fails, show error messages and return without incrementing cur.
Step state management
The stepper has three states per step: pending (grey circle with number), active (accent ring with pulsing outer glow), and done (filled circle with checkmark). These are managed by index comparison: steps before currentStep are done, currentStep is active, steps after are pending. Each step dot uses CSS conditional classes rather than inline styles — this keeps the visual logic in CSS where it belongs.
Validation before advance
goNext() checks required fields in the current step before advancing: const required = currentPanel.querySelectorAll('[required]'); const valid = [...required].every(f => f.value.trim()). If any required field is empty, the step does not advance and the empty fields get a red border via .invalid class. This prevents users from reaching the final step with incomplete data.
Progress line fill
The connecting line between step dots fills progressively: width: (currentStep / totalSteps) * 100 + '%'. The line uses a gradient from accent to accent — a visual indicator of overall progress separate from the individual step dots.
Data collection across steps
Each input retains its value as steps change because the panels are shown/hidden via display toggle, not created/destroyed. Collect all form values at the final step using new FormData(formElement) or querySelectorAll('[name]') to gather all named inputs regardless of which panel they are in.
Step by step
How to Use
- 1Click Next and BackClick Next to advance through steps. The dot stepper updates with active and done states. Click Back to return.
- 2Update step contentIn the HTML panel, change the heading, field labels, and input types in each .step-content div.
- 3Add a fourth stepAdd a .step-dot and connecting .line element in the stepper row, and a .step-content div. Update const total = 4 in the JS.
- 4Add step validationIn the JS next() function, check required fields before incrementing cur. If a field is empty, show an error and return.
- 5Change accent colourUpdate the accent colour (#6366f1) on .step-dot.active, .step-dot.done, and .connecting line in the CSS panel.
- 6Export in your formatClick "HTML" for a standalone file, "JSX" for a React component, or "Tailwind" for a React + Tailwind version.
Real-world uses
Common Use Cases
Got questions?
Frequently Asked Questions
next() increments cur if cur < total; prev() decrements if cur > 1. After either, update() runs — it loops i from 1 to total and applies .active/.done to each dot and .active to the matching step panel.
Each .line element between dots has a conditional class. Lines before the current step (i < cur) get .done applied via classList.toggle("done", i < cur). CSS .line.done applies the accent background colour.
Add a .step-dot, a connecting .line, and another .step-dot to the progress row in the HTML. Add a fourth .step-content div. Update const total = 4 in the JS. The update() loop handles any number of steps.
In next(), before cur++, read the current step's required fields: const inputs = document.querySelectorAll("#s" + cur + " input[required]"). Check each input.value. If any are empty, show an error message and return early without incrementing cur.
The Next button changes label to Submit at the last step. Wire the button's onclick to a submit function when cur === total, or replace the button with a real <button type="submit"> inside a <form> element.
Yes. Click "JSX" for a React component. In React, manage currentStep in useState. Derive dot states and panel visibility from currentStep in the render. Validate the current step panel's inputs in the next handler before incrementing.